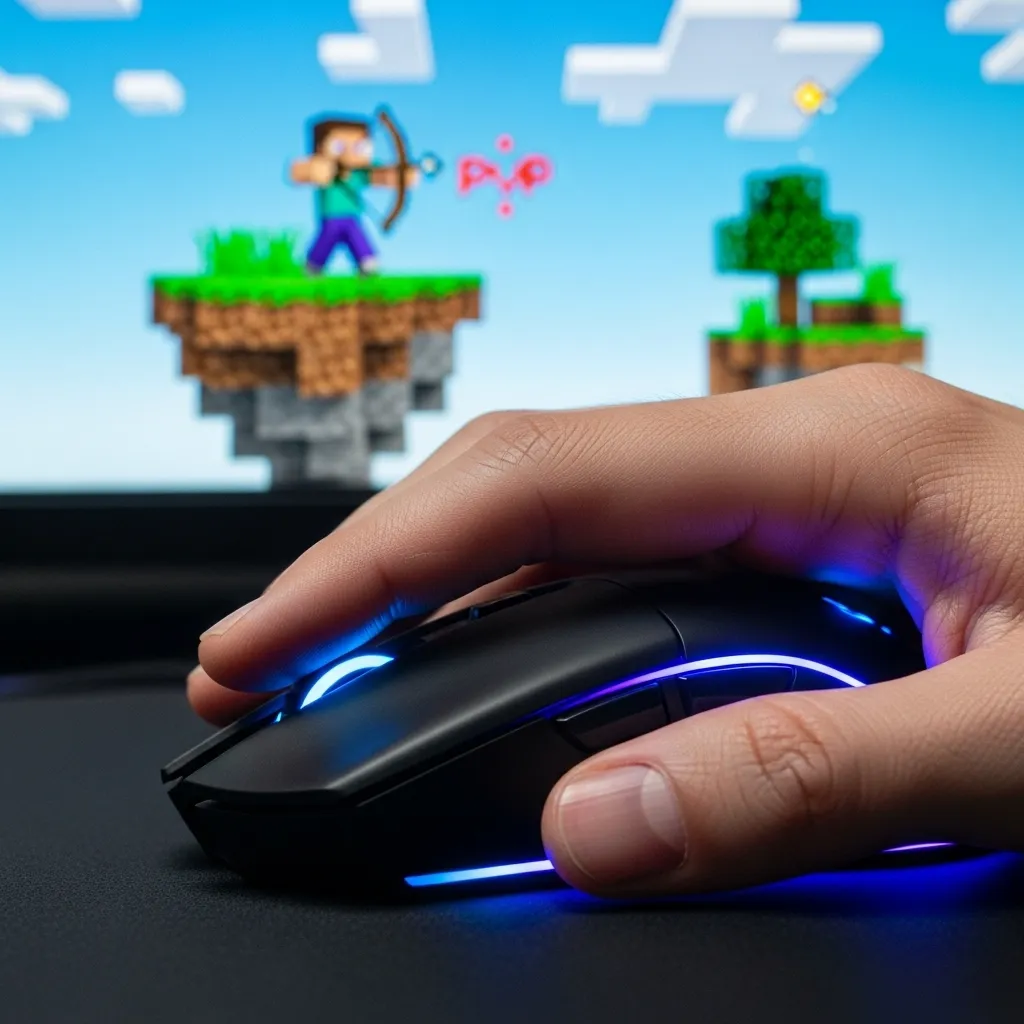
Are you tired of losing fights in Minecraft PvP because your aim feels just a little… off?
Maybe it’s too fast and wild, or maybe it’s too slow and sluggish.
Finding the perfect sensitivity isn’t about copying a pro player’s settings; it’s about discovering a hidden power-up that’s unique to you.
Think of this guide as your personal coach.
We’ll walk you through everything from understanding DPI and in-game settings to simple drills you can use to find that sweet spot.
Get ready to transform your shaky aim into laser-like precision and start dominating your next match.
Key Takeaways
- There is no single “best” sensitivity; you must find what works for your personal playstyle and comfort.
- Your true aim speed (eDPI) is calculated by multiplying your mouse’s DPI by the in-game sensitivity setting.
- Many pro players start with a low mouse DPI (400-800) for better control and precision.
- Use practice drills and make small, incremental adjustments to your settings to find your perfect balance.
The Quest for Optimal Minecraft PvP Sensitivity
So, you’re ready to dive deep into Minecraft PvP and truly master your aiming. Finding the perfect sensitivity setting is like discovering a hidden power-up in your game.
It’s not just a random number; it’s the core of how you control your character’s view.
The quest for optimal sensitivity remains as important as ever for competitive players.
Why Sensitivity Matters So Much
Imagine trying to draw a perfect circle with a shaky hand. That’s what it feels like playing with the wrong sensitivity.
Too high, and your aim is wild. You’ll over-flick and struggle to keep your crosshair on a moving target.
Too low, and you’ll feel sluggish. You won’t be able to turn around fast enough to react to enemies behind you.
The sweet spot allows for both precise micro-adjustments and quick, fluid movements.
It helps you track opponents smoothly during a fight.
And it lets you execute rapid 180-degree turns when needed.
The DPI and In-Game Sensitivity Combo
Your overall mouse sensitivity is a team effort between two main settings:
- DPI (Dots Per Inch): This is your mouse’s hardware setting. Higher DPI means your cursor moves more pixels per inch of physical mouse movement. Most gaming mice let you adjust this with a button or software.
- In-Game Sensitivity: This is the slider you find in Minecraft’s options menu. It multiplies your mouse’s DPI.
Together, they determine how much your screen view rotates when you move your mouse.
Many professional players often combine a lower DPI with a relatively higher in-game sensitivity.
For example, using 400-800 DPI on your mouse with an in-game setting that feels comfortable.
This approach can give you excellent control and precision.
A pie chart showing observed DPI preferences among esports professionals: 400-800 DPI (65%), 801-1600 DPI (25%), 1601+ DPI (10%).
Based on aggregated data from top players, around 65% of esports professionals prefer a mouse DPI between 400-800 for optimal control, as observed on ProSettings.net.
Finding Your Personal Sweet Spot
There’s no single “best” sensitivity for everyone. It’s super personal, like your favorite food.
What works for one pro player might not work for you.
Your ideal sensitivity depends on a few things:
- Mousepad Size: Do you have a small mousepad or a huge one? This affects how much arm movement you can make.
- Playing Style: Are you an aggressive rusher or a precise sniper?
- Comfort: What just feels right to you?
A great way to start is by trying out a lower DPI, maybe around 800 or even 400.
Then, adjust your in-game sensitivity in small steps.
Go into a practice server or an empty world and just move around.
Try aiming at blocks, swinging your sword at imaginary enemies, and performing 180-degree turns.
You want to be able to turn easily but also make small, precise movements without effort.
Remember, your keybinds also play a huge role in your overall control.
Just like fine-tuning your sensitivity, optimizing your keybinds can drastically improve your reaction time and gameplay.
Don’t forget the importance of specific aiming techniques, especially when using ranged weapons.
If you’re looking to dominate with a bow, check out our guide on how to aim a bow in Minecraft PvP.
Practice makes perfect, so don’t be afraid to spend some time experimenting.
What’s your biggest challenge when trying to find the perfect sensitivity setting in Minecraft PvP?
Demystifying eDPI, DPI, and Critical Mouse Settings for Peak Performance
Ever feel like your mouse settings are a complete mystery?
You’re not alone! Many players struggle to understand terms like DPI and eDPI.
But mastering these can seriously boost your Minecraft PvP aiming.
What is DPI?
DPI stands for “Dots Per Inch.”
Think of it like this: how far your mouse cursor moves on screen for every inch you move your physical mouse.
A higher DPI means your cursor flies across the screen with just a tiny nudge.
A lower DPI means you need to move your mouse more for the same on-screen movement.
Most gaming mice let you change your DPI with a button or software.
Understanding eDPI – Your True Sensitivity
While DPI is important, it only tells part of the story.
Your true, effective sensitivity in-game is called eDPI (effective Dots Per Inch).
It combines your mouse’s DPI with your game’s in-game sensitivity setting.
The formula is simple: DPI x In-Game Sensitivity = eDPI.
For example, if your mouse is set to 800 DPI and your Minecraft sensitivity is 0.5 (or 50% in the settings), your eDPI is 400.
Having a consistent eDPI is key for building muscle memory and improving your aim.
Many professional players use a relatively low eDPI.
This allows for more precise movements without overshooting their targets.
A bar chart showing common DPI settings among pro gamers: 400 DPI (45%), 800 DPI (35%), 1600 DPI (10%), and Other DPIs (10%).
Crucial Mouse Settings for Peak Performance
Beyond DPI and eDPI, a few other mouse settings can make a huge difference.
Polling Rate: This is how often your mouse tells your computer its position.
Measured in Hz, a 1000 Hz polling rate means your mouse reports its position 1000 times per second.
A higher polling rate (like 1000 Hz) means smoother, more responsive tracking.
Most gaming mice default to 1000 Hz, which is ideal.
Mouse Acceleration: This is a setting that makes your cursor move faster the quicker you move your physical mouse.
While it might seem helpful, it creates inconsistency.
The same physical mouse movement won’t always result in the same on-screen movement.
For consistent aiming in PvP, you should always turn mouse acceleration OFF.
You can usually find this in your operating system’s mouse settings.
Optimizing these settings is a big step towards improving your control.
Just like finding the best Minecraft PvP keybinds, your mouse settings are a personal choice that impacts your overall performance.
What other peripheral settings do you think have the biggest impact on your game?
Sensitivity Calibration Protocol: Your Data-Driven Path to Precision Aiming
Ever felt like your aim in Minecraft PvP is just a little off? Like you’re either swinging too wildly or barely moving your crosshair?
You’re not alone. Finding your perfect sensitivity is like finding the perfect pair of shoes – it has to fit just right.
This isn’t about copying a pro player’s settings. It’s about a personalized plan, a “calibration protocol,” to find what works best for you in.
Step 1: Understand Your Core Settings
Before we tweak anything, let’s break down the two main things affecting your aim: your mouse’s DPI and your in-game sensitivity.
DPI (Dots Per Inch): This is how sensitive your physical mouse is. A higher DPI means your cursor moves further on screen with less physical mouse movement.
You usually adjust this with a button on your mouse or its software. Common DPIs for gaming are often between 400 and 1600.
In-Game Sensitivity: This is the setting inside Minecraft itself.
It multiplies your mouse’s DPI.
So, DPI times in-game sensitivity gives you your “Effective DPI” (eDPI).
This eDPI is the real number that dictates how fast your crosshair moves.
Step 2: Establish a Starting Point
Many competitive gamers, even outside of Minecraft, prefer lower overall eDPIs. This allows for more precise, controlled movements.
But what’s a good place to start? We can look at general trends in competitive gaming for a baseline idea.
Studies and observations from various competitive titles suggest that about 60% of pro players use a DPI between 400-800.
A bar chart showing approximate common DPI ranges among competitive gamers: 400-800 DPI (60%), 801-1600 DPI (30%), and >1600 DPI (10%).
This chart shows a general trend. While not Minecraft-specific, it highlights the preference for lower physical mouse sensitivity for precise control.
Try setting your mouse DPI to 800 or 1200. Then, in Minecraft, set your sensitivity to a middle ground, like 50-75%.
This gives you a good foundation to build upon. Remember, it’s just a starting point.
Step 3: Practice and Observe
Now, it’s time to actually play. Don’t jump straight into a heated Bedwars match!
Head into a creative world or a practice server. Focus on specific aiming tasks. Try to track moving targets, like chickens or other players.
Practice hitting your combos and managing movement. Work on your bow aiming too; a good sensitivity helps with precision shots.
If you’re looking to improve your bow skills, consider checking out How to Aim a Bow in Minecraft PvP: The Ultimate Guide.
Pay close attention to how your hand feels. Are you constantly lifting your mouse? Or are you struggling to turn quickly?
Step 4: Refine Incrementally
Based on your practice, make small changes. We’re talking about tiny tweaks, like 5% at a time, not huge jumps.
Feeling too slow? Increase your in-game sensitivity by 5-10%. Test again.
Feeling too fast or “floaty”? Decrease your in-game sensitivity by 5-10%. Test again.
The goal is to find a balance where you can smoothly track opponents and react quickly, without overshooting or undershooting your target.
It’s a bit like learning to drive; you start slow, then gradually get comfortable with more speed and control.
Step 5: Test in Real Battles
Once you feel comfortable in practice, take your new settings to real PvP scenarios. Join a server, fight some players.
How do your settings hold up under pressure? Do you still feel precise when you need to land critical hits or dodge an attack?
Consider your overall combat effectiveness.
Does it feel natural to switch targets and engage in close-quarters combat?
If you’re learning about new weapons like the mace, your sensitivity will greatly impact its effectiveness.
You can learn more in our Minecraft Mace PvP Guide 2025: How to Use It Effectively.
This process might take a few days, or even a week. It’s an ongoing calibration.
Your ideal sensitivity is a personal sweet spot that brings together your mouse, your arm movements, and your reaction time.
What’s one small change you’re going to try first in your sensitivity settings?
Step-by-Step Drills, Measurable Benchmarks, and Iterative Refinement for Your Unique Playstyle
Finding that “just right” sensitivity in Minecraft PvP aiming isn’t a one-and-done deal. It’s a journey, unique to every player.
Think of it like learning to ride a bike. You don’t just jump on and go. You practice, fall, adjust, and eventually, it becomes second nature.
This section will walk you through drills, how to measure your progress, and how to keep refining your settings.
Practice Drills to Sharpen Your Aim
You can’t get better without practice. Dedicated aim drills help build muscle memory and improve your reaction time.
Many Minecraft PvP servers offer practice arenas with bots or mini-games designed specifically for aim training. Look for these!
If you play on a private server or single-player, you can create your own training grounds.
- Static Target Practice: Place armor stands or blocks at various distances. Practice quickly snapping your crosshair to them and clicking. Focus on precision.
- Strafing Practice: Have a friend (or a modded bot) strafe back and forth. Try to keep your crosshair locked onto them as they move. This teaches tracking.
- Flick Shot Training: Start looking away from a target, then quickly “flick” your mouse to snap your aim onto it and hit. This is great for unexpected encounters.
- Vertical Aiming: Practice looking up and down quickly, following targets that might jump or drop. Many players neglect vertical aim.
- PvP Bot Arenas: Many servers have dedicated bot areas. Use these to simulate real combat scenarios without the pressure of a live match.
Don’t just do these drills once. Make them a regular part of your warm-up before jumping into real PvP battles.
Measurable Benchmarks for Improvement
How do you know if you’re getting better? You need to track your progress. Setting benchmarks helps you see tangible improvements.
Think about what you want to improve. Is it consistency? Reaction time? Headshot accuracy?
Here are some simple benchmarks you can track:
| Benchmark | How to Measure | Goal |
|---|---|---|
| Hit Percentage (Bots) | Number of hits / Total clicks on practice bots. | Increase over time, aim for 70%+ consistently. |
| Flick Shot Speed/Accuracy | Time taken to flick to 10 targets, number of hits. | Faster times with 80%+ accuracy. |
| Tracking Consistency | Seconds maintaining target lock on moving bots. | Longer, smoother tracking duration. |
| K/D Ratio (Actual PvP) | Kills divided by Deaths in PvP matches. | Gradual increase, indicating better overall combat. |
| Duel Win Rate | Number of duels won / Total duels played. | Higher win rate shows improved combat effectiveness. |
Keep a simple log. Note your sensitivity settings and your scores for different drills. This will help you see trends.
Iterative Refinement for Your Unique Playstyle
This is where the magic happens. Your ideal sensitivity isn’t fixed; it evolves with you.
After practicing with your current sensitivity, ask yourself: Does it feel too fast? Too slow? Are you overshooting targets, or struggling to turn quickly?
Make small adjustments, not huge jumps. Move your sensitivity up or down by tiny increments, like 5-10% at a time.
Then, go back to your drills. Test the new setting. Does it feel better? Does your accuracy improve?
It’s a cycle: Test – Analyze – Adjust – Repeat.
Your unique playstyle also matters.
If you prefer to be very aggressive and quick, a slightly higher sensitivity might work.
If you like precision and strategic movement, lower might be better.
Remember, other aspects of your PvP game also play a role.
Improving your aim goes hand-in-hand with mastering other mechanics, like how quickly you can click.
If you’re looking to boost your overall combat effectiveness, you might want to learn how to improve your clicks per second as well.
It’s all about finding what feels right for you and your hands.
What specific drills have you found most effective in improving your Minecraft PvP aim, and how do you track your progress?
Beyond Sensitivity: Advanced Techniques and Pro Insights for Dominant PvP Aim
Setting up your perfect sensitivity is a fantastic first step in becoming a PvP master. Think of it like tuning a guitar – you need it just right.
But having a perfectly tuned guitar doesn’t make you a rockstar overnight. You also need to learn chords, rhythms, and stage presence!
The same goes for Minecraft PvP. Beyond sensitivity, there are many advanced techniques that can elevate your game.
Mastering Movement and Positioning
Your movement isn’t just about getting from one place to another. In PvP, how you move directly impacts your aiming ability.
Good movement makes you harder to hit, but it also helps you line up your own shots. Imagine a dance, where every step puts you in a better position to strike.
Techniques like “W-tapping” (briefly letting go of ‘W’ to reset hit registration) or “S-tapping” (tapping ‘S’ to briefly slow down) are crucial.
These small, precise movements allow you to control your momentum and keep your crosshair locked onto your opponent.
Learning how to quickly bridge across gaps or around enemies can also give you a huge advantage, letting you dictate the fight’s pace and positioning.
If you want to dive deeper into movement, check out our guide on your guide to the fastest Minecraft PvP bridging now.
Crosshair Placement – The Silent Pro Skill
This is a subtle but powerful technique. Pro players often keep their crosshair near where an enemy is likely to be, rather than wildly swinging it around.
This means less distance your mouse needs to travel to react. It’s about anticipation and efficiency.
Always try to keep your crosshair at head level when approaching corners or open areas. This way, if an enemy appears, you’re already mostly aimed.
Good crosshair placement reduces the need for large, reactive flicks, making your aiming smoother and more consistent.
Beyond Basic Clicking: Unleashing Your Attack Speed
Just left-clicking isn’t enough in high-level Minecraft PvP. Your attack speed, or Clicks Per Second (CPS), matters a lot for damage and combos.
Many pros use advanced clicking techniques to maximize their CPS, which can keep opponents in a hit-stun lock.
Methods like “jitter clicking” (tensing your arm to vibrate your finger rapidly) or “butterfly clicking” (using two fingers to alternate clicks) are common.
These techniques allow you to hit your opponent more frequently, giving you an edge in trades.
For more details on boosting your attack speed, read our guide on improving your clicks per second.
Finding a clicking style that’s comfortable and effective for you is key. Practice different methods to see which one feels most natural.
Your Gear Matters (A Little)
While skill is king, your equipment plays a supporting role. A good mouse with a reliable sensor and comfortable grip can make a difference.
Gaming mice often offer adjustable DPI (Dots Per Inch) settings, which allow for more precise control over your sensitivity.
A smooth, consistent mousepad also helps. It ensures that your mouse movements are translated accurately to the screen.
Ultimately, choose gear that feels good in your hands and allows you to perform consistently without discomfort.

The Power of Practice and Mindset
Even with the best sensitivity and techniques, consistent practice is what truly makes a champion. Treat PvP like a sport.
Spend time in aim trainers or on PvP servers specifically designed for duels. Focus on one or two techniques at a time until they become second nature.
Review your gameplay. What went wrong? What went right? Learning from your mistakes is a fast track to improvement.
Beyond skill, your mindset is critical. Staying calm under pressure, not getting frustrated after a loss, and maintaining focus are all essential.
A positive attitude and a willingness to learn will carry you much further than raw talent alone. Remember, everyone starts somewhere!
Pro Insights: Common DPI Settings
While in-game sensitivity is personal, many professional gamers across various titles tend to stick to a few common DPI settings on their mice.
This often creates a balance between precision and the ability to turn quickly.
A pie chart showing common DPI settings among professional gamers: 800 DPI (45%), 400 DPI (20%), 1600 DPI (15%), and Other (20%). This data is based on information from ProSettings.net.
As you can see, 800 DPI is a very popular choice among pros. This doesn’t mean it’s the only way, but it offers a good starting point for experimentation.
Pro Tips for Dominant PvP Aim
Here are some quick tips often shared by top Minecraft PvP players:
- Practice Daily: Even 15-30 minutes of dedicated aim practice can make a huge difference.
- Maintain Distance: Learn to “strafe” and keep your opponent at an optimal range for your hits.
- Use Prediction: Anticipate where your opponent will move and pre-aim accordingly.
- Stay Calm: Panic ruins aim. Take deep breaths and focus on hitting your shots.
- Customize Keybinds: Ensure your keybinds are comfortable and efficient for quick actions.
- Watch Pros: Learn by observing top players’ movement, aiming, and clicking patterns.
Putting all these pieces together-your perfect sensitivity, smart movement, precise crosshair placement, advanced clicking, and a strong mindset-is what truly makes you a dominant force in Minecraft PvP.
What’s one advanced technique you’re excited to try out or improve upon in your next Minecraft PvP match?